
It has begun! the mad dash to get things ready for next year.
In my last post I showed you my List.
well today I will show you the first thing finished on, said list.
Spats.
I have always liked the look of spats.
They are very historic for the period(1860's) for both men and women.
plus it is a great way to make boots/shoes that may not be all that accurate, look more so!
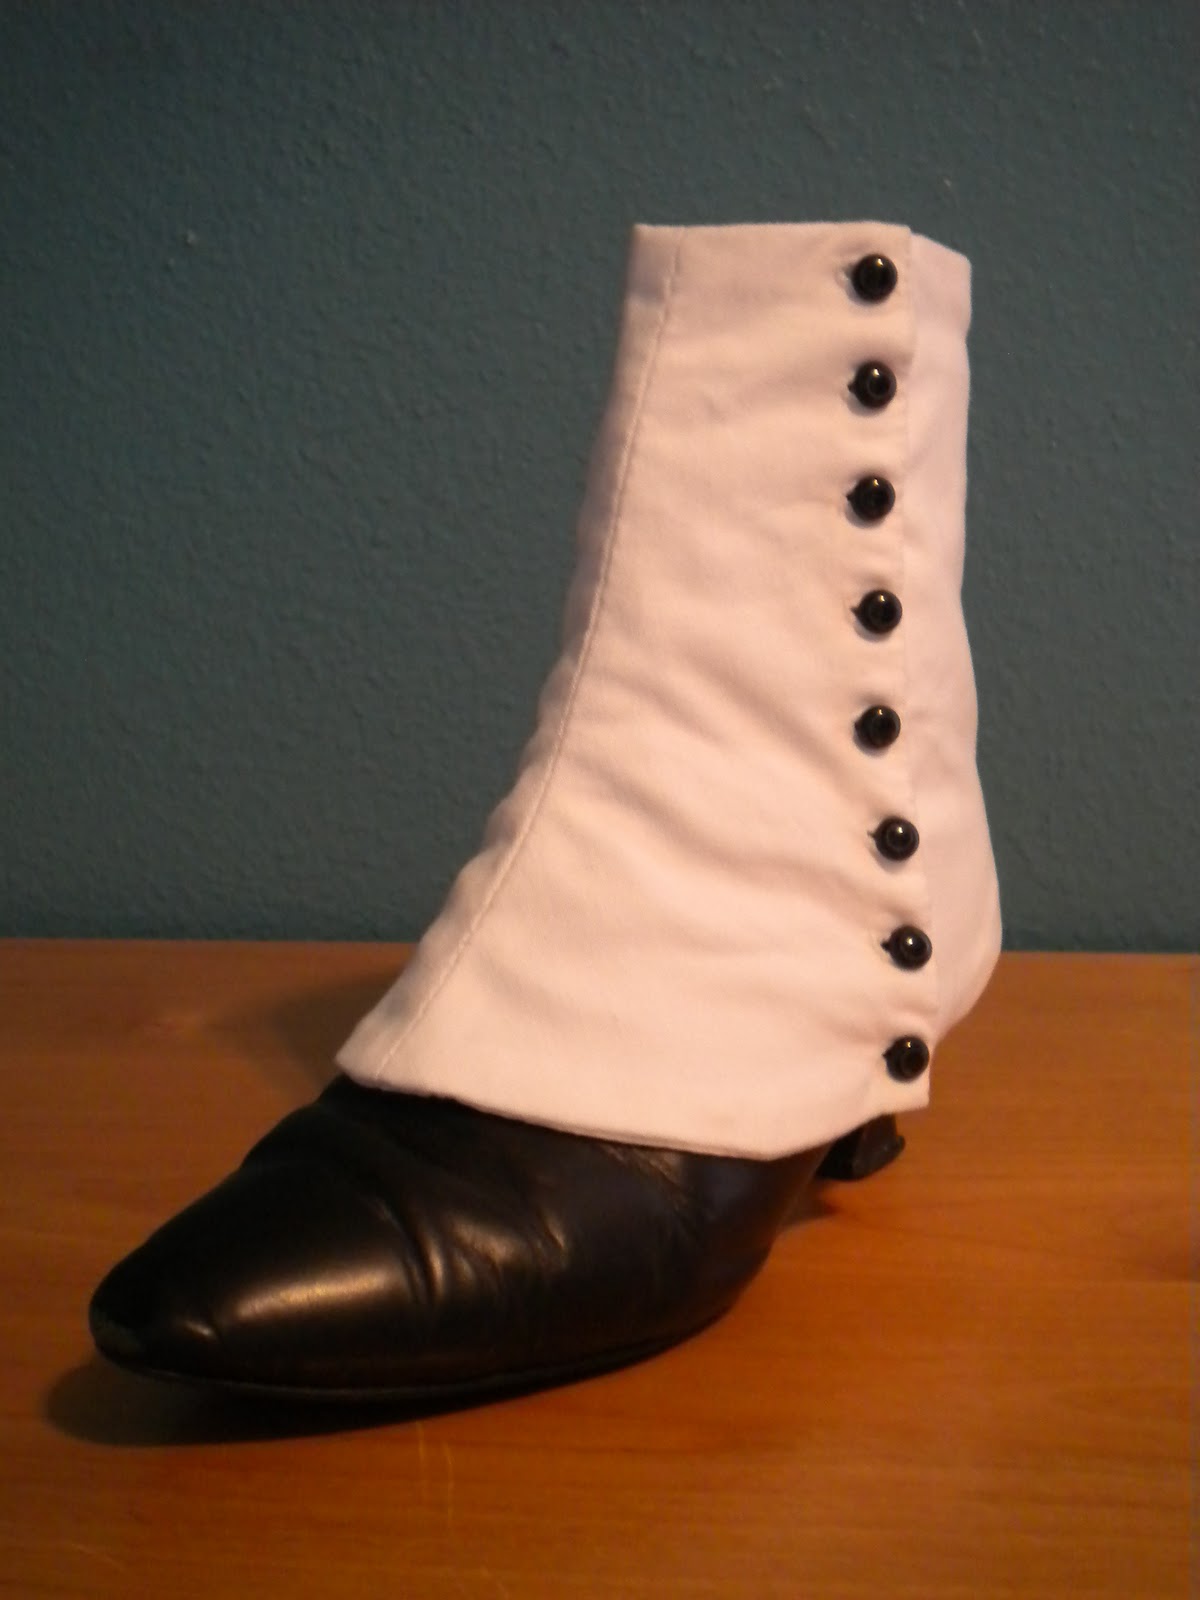
Here are my boots.
In my last post I showed you my List.
well today I will show you the first thing finished on, said list.
Spats.
I have always liked the look of spats.
They are very historic for the period(1860's) for both men and women.
plus it is a great way to make boots/shoes that may not be all that accurate, look more so!
Here are my boots.

I know, they are a little to late for the era I reenact but, they are the best I could find a few years ago with out having to spend a butt-load of money.
When ever I start a project that I have to create a pattern form scratch, it always helps to sketch it out.to get the "feel" of things

The fabric I used is white heavy cotton.

to make the pattern I first traced the outline of the boots

Then I added a half inch for seems, and decide what the bottom edge should look like
It should have a nice curved shape to it.

The outside edge of the spats is where the buttons should be placed.
So I made a half toe section and half heel section pattern pieces.

Next came cutting out the fabric and sewing the heel and toe seems
making sure to leave the button flap open!!!do not sew these closed!!!
Here they are with these seems complete.
you sew the lining in the same manner.

Then with right sides together you sew the lining to the outer at top and bottom seems.
once again, don't sew the button flaps!!!they remain open!
Turn right side out and press

Here they are pinned on the boot.


The buttons that I got are 3/8'' black shank back plastic.
I got these because they look like they could be glass. but cost a lot less!

They are not solid black. but from a distance you would never know.

I thought they had a really nice shape to them.

Now, on the button flaps you iron the edges in a half inch.
you want it so it looks smooth and clean on both sides.
Then top stitch the opening closed.

Mark the button holes.
On my spats the math worked out perfectly, I had 16 buttons, the button flap was 9 inch's from top to bottom. so at top and bottom I placed a button half inch form edge then every inch. 8 button on each spat.

Now to sew the 16 button holes by hand...


yay! all done with that part!

Then sew on the buttons and the flaps that go under the arch of the foot
and befor you know it, you have spats!


To measure for the arch flap.
Put the spats on over the shoes you will be wearing them with and measure the distance between.
Making sure to figure in the button and button hole!

And there you have it! a pair of spats to keep you're shoes nice and tidy!
First thing crossed of the list!

I hope this may help you if you are wanting to make some spatterdash's!
Happy Spat(ting)~
Kacie
No comments:
Post a Comment