It has taken me nine years to finally come to the decision to make myself a bonnet.
I think one of the reasons it has taken me so long, is
that I have never tried on a bonnet that looked good on. Plus they can be rather expensive...
So, the week we got back from Mc'' I started planning my bonnet.
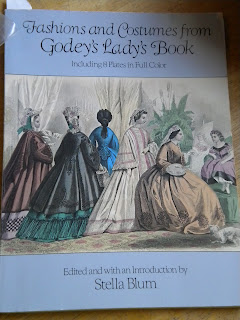
Here is where I get a LOT of inspiration from-
I think one of the reasons it has taken me so long, is
that I have never tried on a bonnet that looked good on. Plus they can be rather expensive...
So, the week we got back from Mc'' I started planning my bonnet.
Here is where I get a LOT of inspiration from-
I had thought of buying the buckram base then just covering it myself, but alas,
I couldn't find a base that was under $60, and none in the style that I prefer.
I'm not really a fan of the "spoon" bonnet. I'm more of the coal-hodge type.
this style is slightly early, more1850's then 1860's..
When it comes to decisions about, "oh, that's to early.." I think to myself- well, I think that if I lived back in1863 I would most likely have the same personality then, as I do now. I like older styles.
Always have. Always will.
~
We have the McCall's bonnet pattern.
I found that it does come in size's!

Here is the bonnet my mother made few years back.
it's black Dupioni silk.
mmmmsilkmmmm
She used size Large
A little to large for my grape sized head...

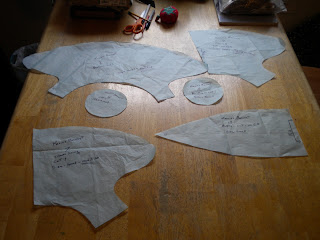
even in size Small it was a little to big so I modified the pattern a bit.
I cut a straight line near the back, cut it then taped it back on an inch farther up.
And Bob's your Uncle!
I had to modified a few more pieces as well. nothing to drastic though.
Then I got out the buckram.
Buckram is, well I'm not all together sure what it is but I think it is net that is coated in something rather like glue. It feels slightly tacky to the touch. and it is very stiff.
I cut out the bonnet and sewed the back flaps to form that bonnet shape.
then I sewed on the wire to help it keep it's shape.
And there you have it the basic shape! it was not as hard as I thought it might be! it was rather easy actually!
In Part #2. I will show you how I covered and decorated Le bonnet!
Happy Hatting~
Kacie


Ooh! It's so pretty!
ReplyDelete