Before Ft. Stevens, my last post had been about My 1863 coat project.

After receiving some very good comments
( Thank you every one who left one! )
I decided that I would go the authentic rout and have the hood to the coat detached.
I decided that I would go the authentic rout and have the hood to the coat detached.
Once I had come this conclusion, it was time to finalize my design.
The fabric that I found online.
100% Wool for $6.99 a yard!
It is a great Red/Brown color.
I got 5 1/2 yards, 58'' wide.
I decided that I would be using Dorset buttons for the closure.
I had learned how to make them before Willamette
( That new brown dress with the buttons down the front.
Yeah, thous are ALL hand made Dorset buttons...)

I have always wanted to use for on one of my projects.
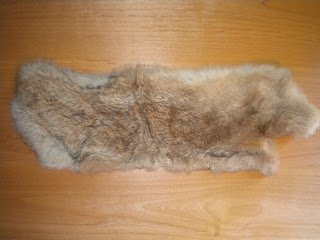
So when I found rabbit fur pelts at Joann's on clearance for about $5.95 APIECE!!
I knew I would finally be able to have mmmfurmmm.
I knew I would finally be able to have mmmfurmmm.
I got this flannel wonderful flannel for freeeeee earlier this year.
I had JUST enough for my coat!
I had JUST enough for my coat!
You can find patterns for 1860's traveling coats but,
I'm cheap and decided that once again I could just make my own pattern.
( This is turning into a habit... )
Here is the pile of all my pieces cut out and ready to go.
Here is the pile of all my pieces cut out and ready to go.
And here is the finished product.
Basically this is a cape with sleeves.
Coat sleeves in fact.
Four Dorset button closure, two pockets, jewel neckline, quilted hem.
And that is the coat in a nut shell.
( The quilted hem did not turn out as awesome as I thought it would. It would have been better if I had used a contrasting color instead of a thread that matched. So in the end it just makes the hem look crinkly, but I know that there is a beautiful paisly quilted hem that compliments the lining... )
( The quilted hem did not turn out as awesome as I thought it would. It would have been better if I had used a contrasting color instead of a thread that matched. So in the end it just makes the hem look crinkly, but I know that there is a beautiful paisly quilted hem that compliments the lining... )
The great colorful flannel lining

Now, as I made the hood removable I wanted there to be a fur collar as well as having fur around the hood.
I found that the hood would not fit properly with a collar though.
So to solve this problem I made the collar removable.
It attaches to the coat with glass buttons.
It only takes a few seconds and I can just pot the collar on and off.
Here is the coat with a puffy skirt underneath.
It is rather large.. and makes me look as though I might be pregnant but it is SO warm and comfortable that I really don't care!
Now for the hood.
Here is the down.
Here it is up.
Unfortunately the fur makes the hood opening a little wonky but I can kind fix that.
And here is the hood AND the coat together.
I am so glad that I had this coat at McIver!
I had a really bad cold the week of McIver and was not fully recuperated by the weekend. It was very cold and wet during the mornings. walking to the bathroom through knee high WET grass was not as bad as it could have been with the warm embrace of this coat around me.

If you ever see me wearing my coat and I have nothing better to do.
You might see me doing this.
What am I doing you may be asking yourself?
Why I am playing with the spinny thingy that I made
Why I am playing with the spinny thingy that I made
( I am sorry I can't remember what they are called...)
On one side it is a ship on a sunny day.
Everything honky-dory
The other side...
Is a steep drop off.

When you hold on to the strings and twist, the two picture blend together, forming one picture
I wish I could capture it on photo.
I wish I could capture it on photo.
but alas, I can't.
I always keep it in the left hand pocket of my coat.
I am so very happy with how my coat came out!
So much better having sleeves then constantly fight a cape flipping here and flapping there.
I am thinking I might just wear it around this winter I love it so much!
( Plus it seems a shame to only wear it a few times a year when it is a good $40something coat! )
Happy Warmth~
Kacie


Coziness! You and your coat are so beautiful... it makes me want to give you a hug. Cute hair! That is my most favorite hairstyle on you EVER! I love it. Love the fur collar, ADORE the hood with the pointed...points. =] And the Spinny Thingy!! I want one! I shall make one! It's on my list. oh dear...
ReplyDeleteLove...
Marguerite